WSER UNIVERSAL MOTOR GUIDE
Power: AC 120v/60Hz
Protection Index: IP44
Up to 15 remotes (or channels) may be assigned to each motor. Thermal protection will engage after 4 minutes of continuous running.
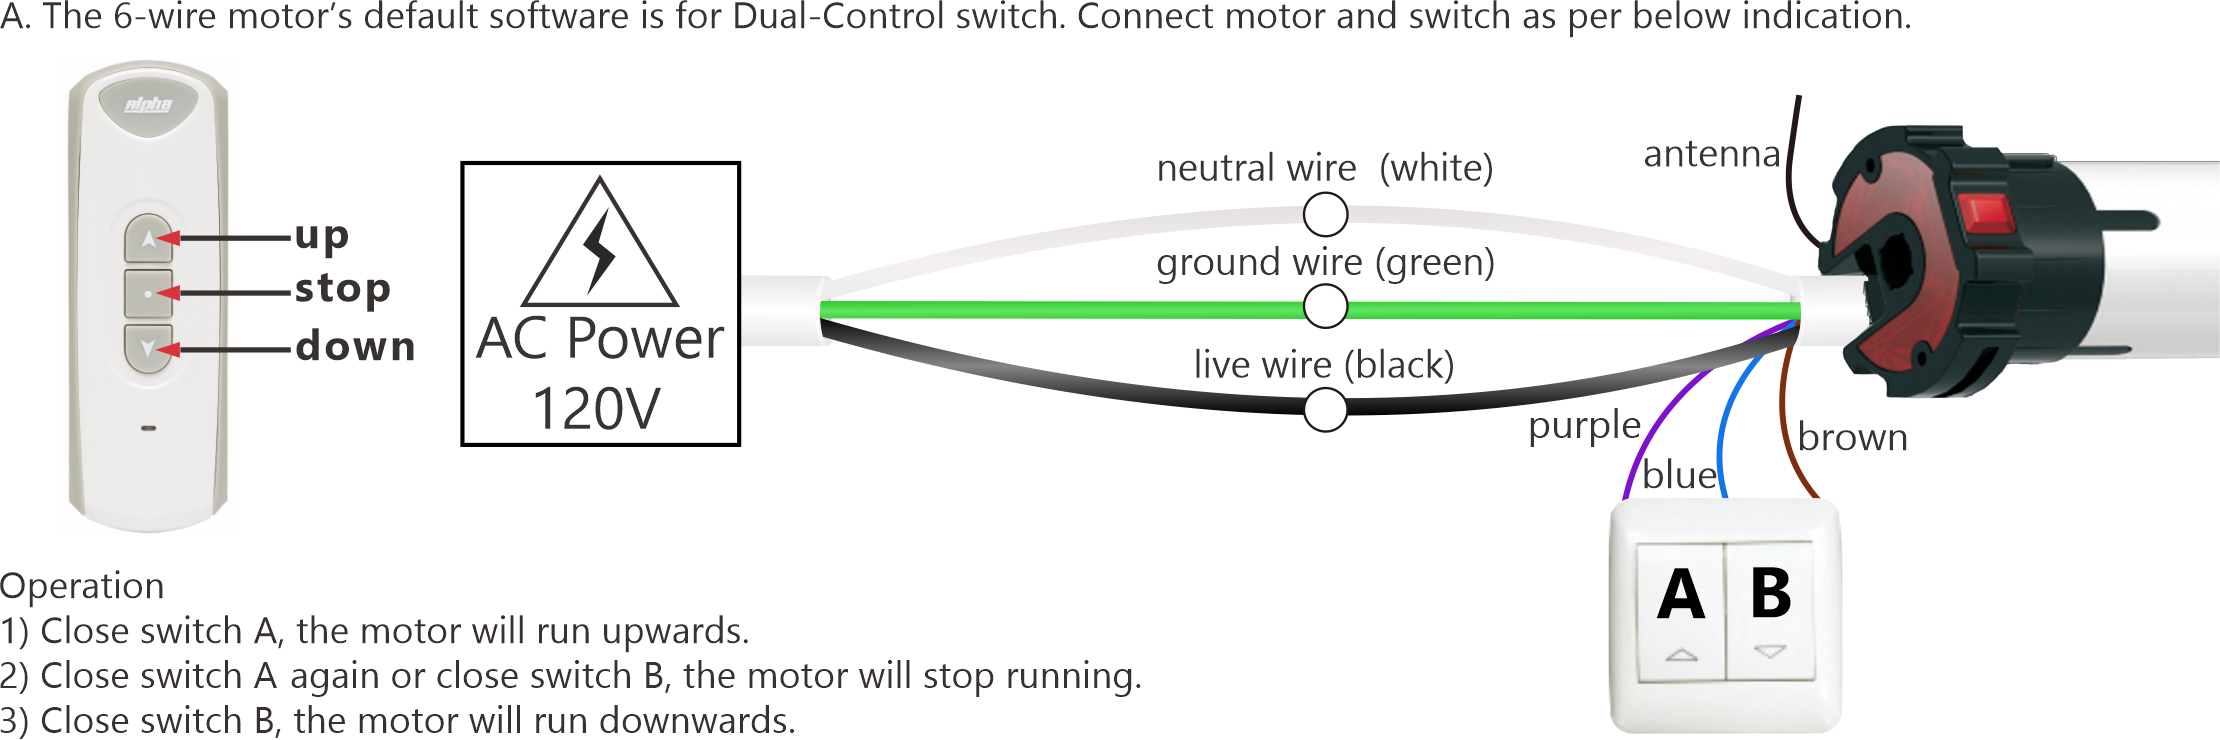
WIRE CONNECTIONS

ASSIGNING A REMOTE TO A MOTOR
you have 10 seconds to complete the task
Method A (only works for the first remote assigned to the motor)

Method B (can be used any time)

Method C Use Method C, if Method A or B do not work. Can only be used if you cut and restore power to the motor 3 times. You must allow 5 seconds before restoring power each time and you must allow the motor to vibrate properly each time. After the third cycle, you may assign the remote.
CHANGING THE MOTOR'S DIRECTION

TURN ON "STEP-BY-STEP" MODE

TURN OFF "STEP-BY-STEP" MODE
(motor will run up and down as normal)
SETTING THE TOP LIMIT
First move the blind to the desired position.

SETTING THE BOTTOM LIMIT
First move the blind to the desired position.


DELETING THE TOP LIMIT
First move the blind to the desired position.

DELETING THE BOTTOM LIMIT
First move the blind to the desired position.

ASSIGNING AN EXTRA REMOTE
You can assign an extra remote (or channel) to a motor via the original remote.

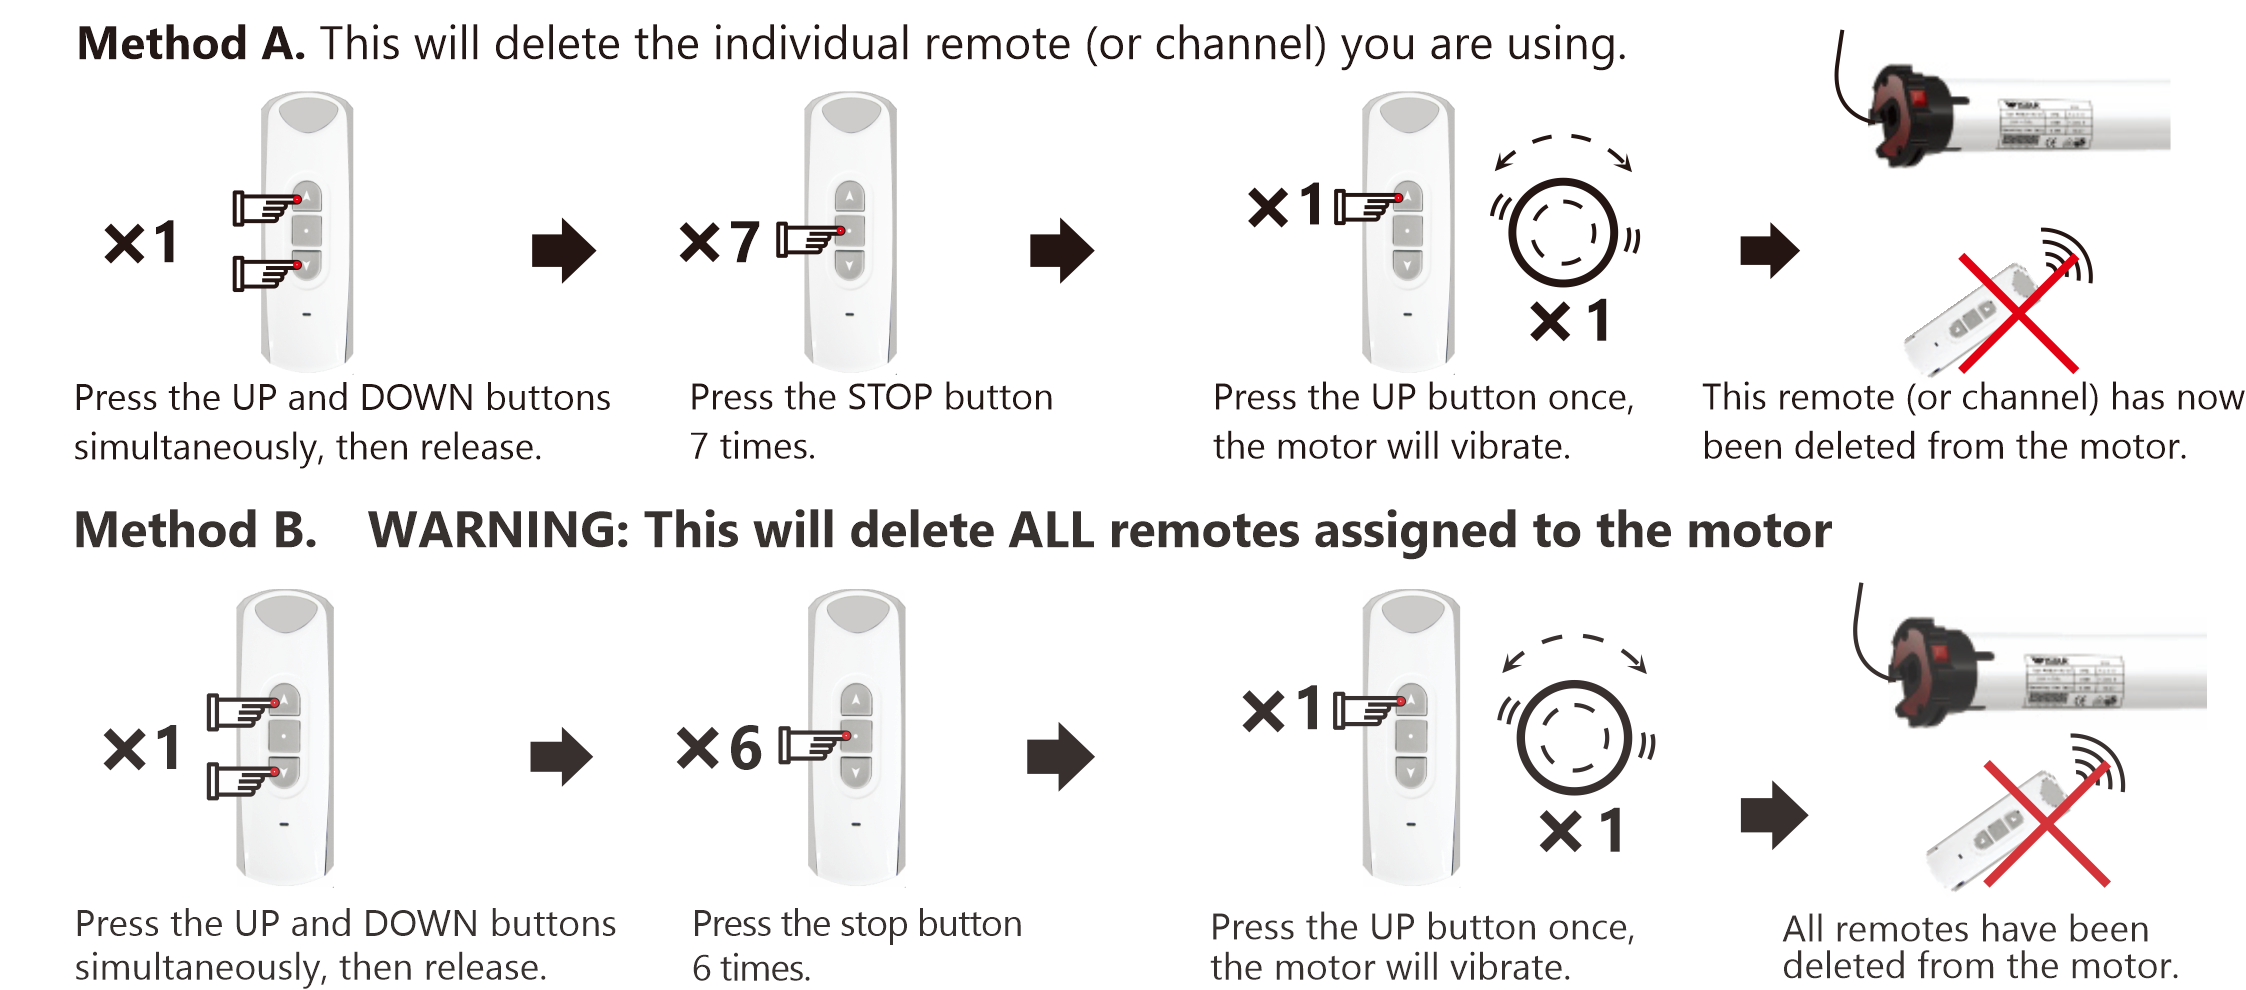
DELETING A REMOTE (OR CHANNEL) FROM A MOTOR

SETTING THE THIRD LIMIT
First move the blind to the desired position.
Midway position, somewhere between top and bottom limits.

CHANGING THE THIRD LIMIT
First move the blind to the desired position.
NOTE: The third limit will be deleted automatically if either the top or bottom limits are deleted.

OPTIONAL FUNCTION: WORKING WITH MANUAL SWITCH

SINGLE CONTROL SWITCH
Can be compatible with 5 core wires WSER tubular motor.
B. If you want to use the motor with Single-Control switch, please connect motor and switch as per below indication first.
Then use an assigned remote to do following steps:
- Short press remote’s UP & DOWN button simultaneously and release.
- Short press remote’s STOP button 7 times.
- Short press DOWN button one time and release, the motor jiggles.
Now you can use the Single-Control switch to control the tubular motor properly. The tubular motor will run Up-Stop-Down Stop-Up-Stop cycle when the switch is pressed each time.

ANNOUNCEMENT
- The RE101 remote has been used as an example here in diagrams. All Alpha remotes are compatible with these motors.
- Strong local RF levels from other equipment may affect some setup functions. If a step fails, simply repeat the process.
- Be careful not to speed through the setup process until you are 100% sure of what you are doing.
- These motors and accessories are not toys, do not allow children to play with them.
- Ambient operating temperature is: -10°C to +55°C
- All Alpha products may be subject to change without notice.
HANDY TIPS
- If this motor is used on an awning and works with the Alpha RS001 wind-light sensor or RS005 motion sensor, there is constant radio communication between the motor and sensor. If the motor doesn't receive radio communication from the sensor for 35 minutes after opening, the motor will automatically close the awning as a protective measure. This indicates that there is either a problem that needs investigation, or in the case of the motion sensor that the batteries might need changing.
- Always roll the blind down and up before setting the top limit. Failure to do so may result in a change of limit position due to a change in blind tension. Simply setting the bottom limit first will prevent this happening.
- When pressing up and down simultaneously during setup, be as precise as possible. Ideally it should sound like one button click when both are pressed.
- If you catch yourself making an error during a setup process, stop and allow 10 seconds for the motor to time out, then try again.
- Do not hold any buttons down during setup process unless specifically told to do so. A half second press should be plenty and allow 1 second between presses.
- If you are using a multi-channel remote, make certain that it is on the correct channel before you assign it to a motor. This is a common mistake.

