PIONEER REMOTE INSTRUCTIONS
Power: AC 120V/60Hz
Protection Index: IP44
PRODUCT APPEARANCE
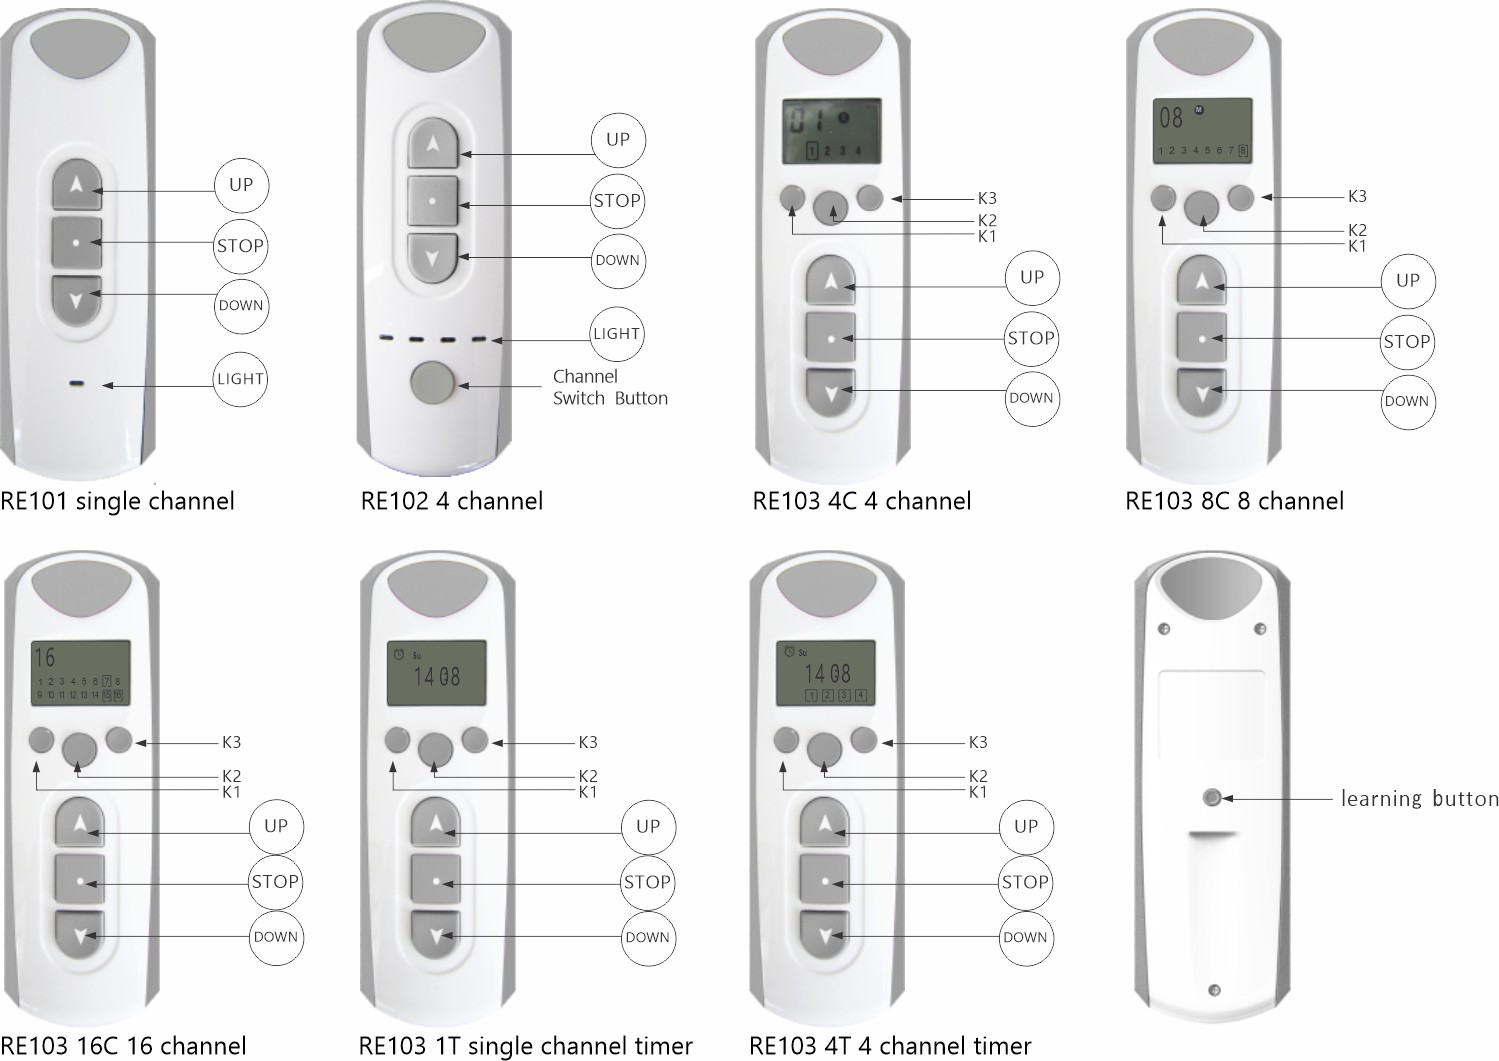
TECHNICAL SPECIFICATIONS
Power: 3V
Model: CR2430
Protection Index: IP20
Currency: ≤12mA
Code: Rolling
Frequency: 433.92MHz
Working Temperature: -10℃ to +60℃ (LCD remote)
Working Temperature: -20℃ to +60℃ (Non LCD remote)
CODE LEARNING
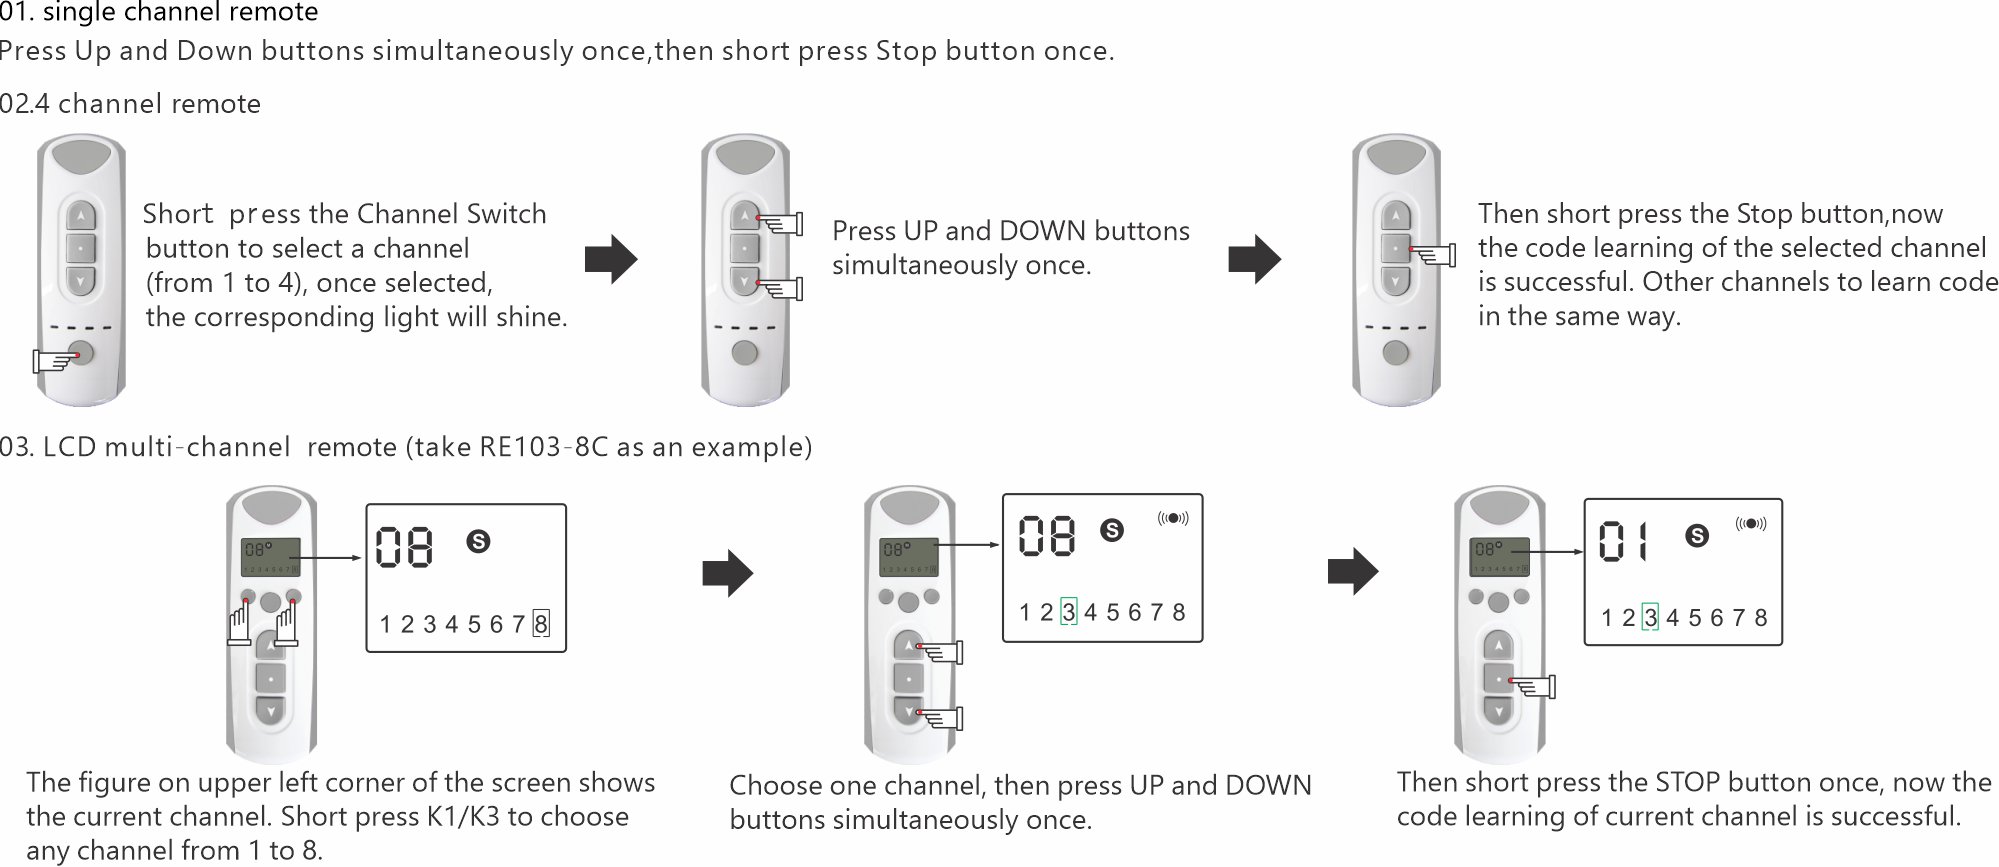
SINGLE CONTROL
Press K1/K3 button to select a channel, then the corresponding motor can be controlled by the remote through UP/STOP/ DOWN button.
GROUP CONTROL (4 CHANNEL REMOTE)
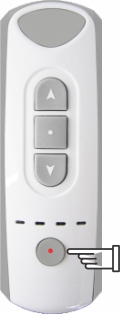
Short press the Channel Switch button to select different channels (from 1 to 4), once selected, corresponding light will shine.
Note: If all of the 4 lights are on, it means the remote is in Group Control state.
GROUP CONTROL (LCD REMOTE)

DELETE GROUP CONTROL

RE103-T
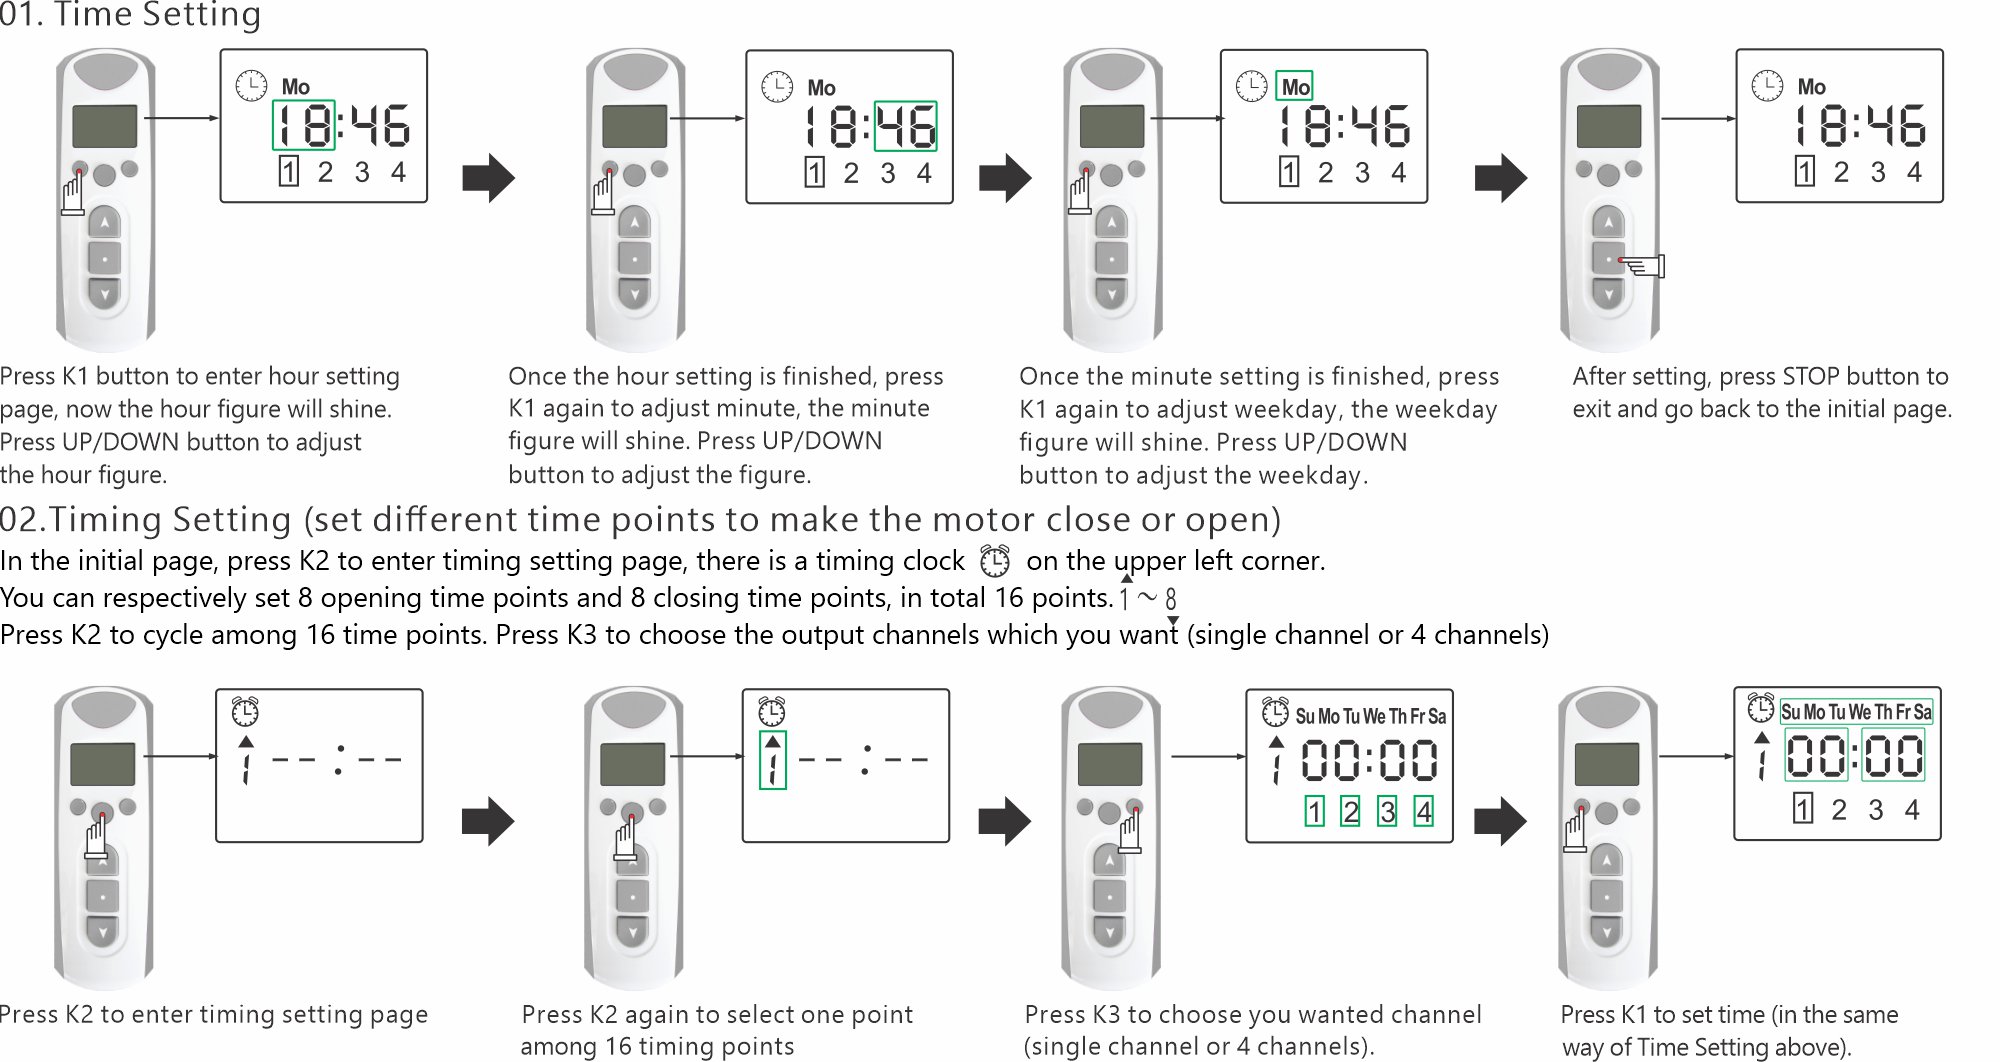
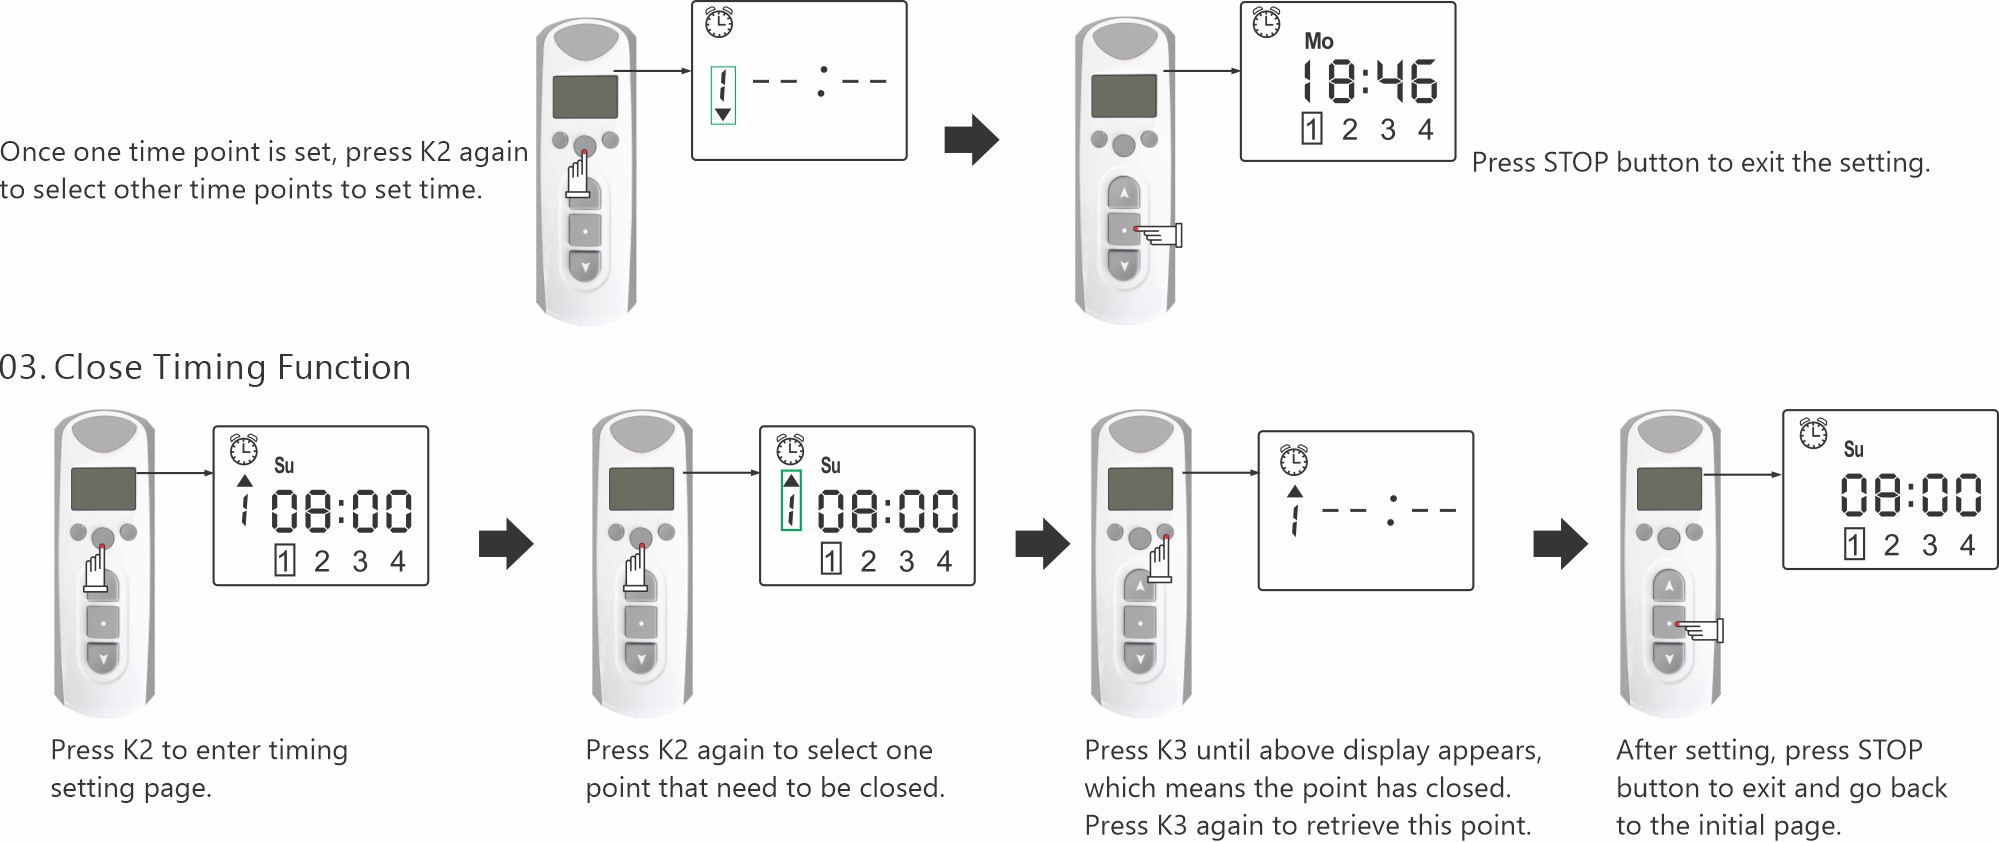
RE103-IT
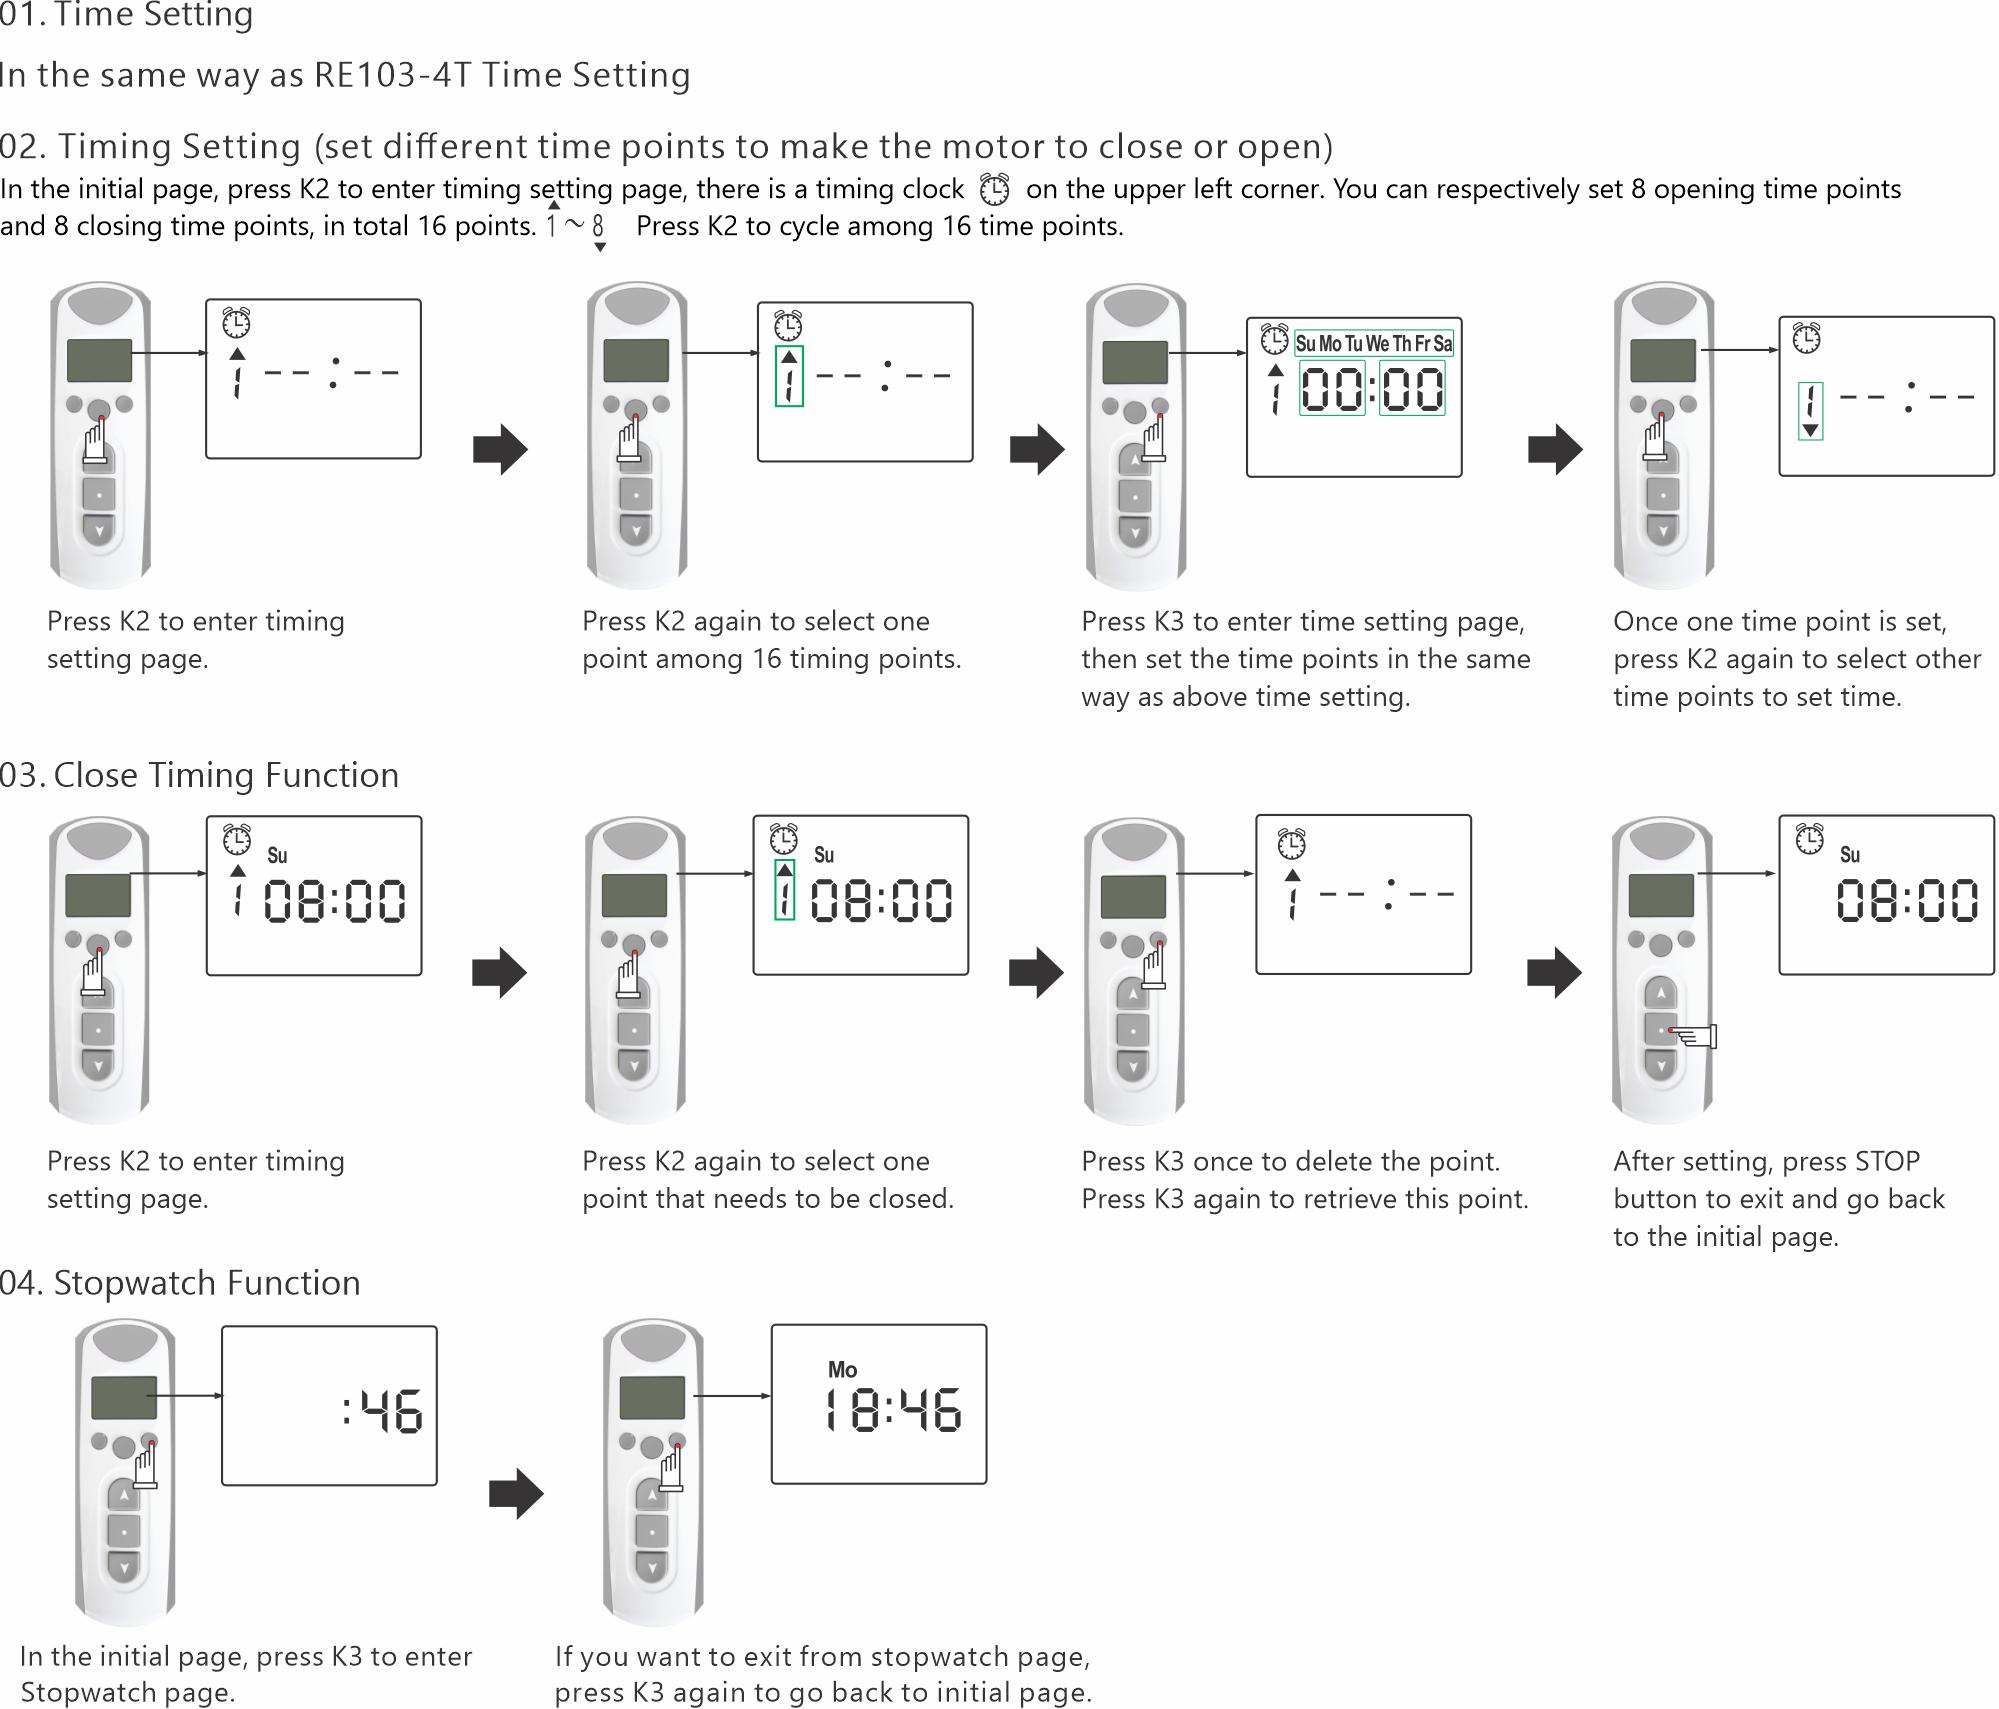
NOTE: The remote must enter into timing setting page if you want to set timing points (there is a timing clock on the upper left), otherwise, the setting is invalid. If there is no timing clock on the upper left, hold STOP button and press k2 within 10 seconds, then the timing clock will be there.
You'd better not press remote's buttons too long. Each pressing is about 0.5s and the pressing interval is about 1s.
The remote will stop working if the battery is in low power. Please replace the battery in this case.

