WSS/WSM SERIES MOTOR GUIDE
TUBULAR MOTOR INSTRUCTION
for mechanical limit switch standard motor WSS series and manual override motor WSM series.
WARNING
Before assembling and using the tubular motor, please carefully read the specification, in order to avoid the damage of the motor or injury of person.
Each of these products has a rigorous testing before leaving factory so you can assemble it as a whole and use safely. Prohibiting opening it and changing the inner parts without authorization (except adjusting limited replacement stroke), if not, we do not bear the sequent.
TUBULAR MOTOR GENERAL DESCRIPTION
Our tubular motor, adopting advanced technology, is developed by our own company. There are four main parts of the motor: motor, break, gearbox, and limit switch. The motor can be widely used in awning, roller blinds, garage door, projection screen, etc.
Features:
- Small, light and low noise, hidden.
- Stable and durable limit switch makes sure the motor has excellent performance for long.
- Thermal Protector can make the tubular motor stop automatically when working temperature is over 130℃. When the temperature goes down (about 15 minutes), the motor can work again.
- Perfect shape, simple operation, convenient to assemble.
- The rate of insulation is F. 2.
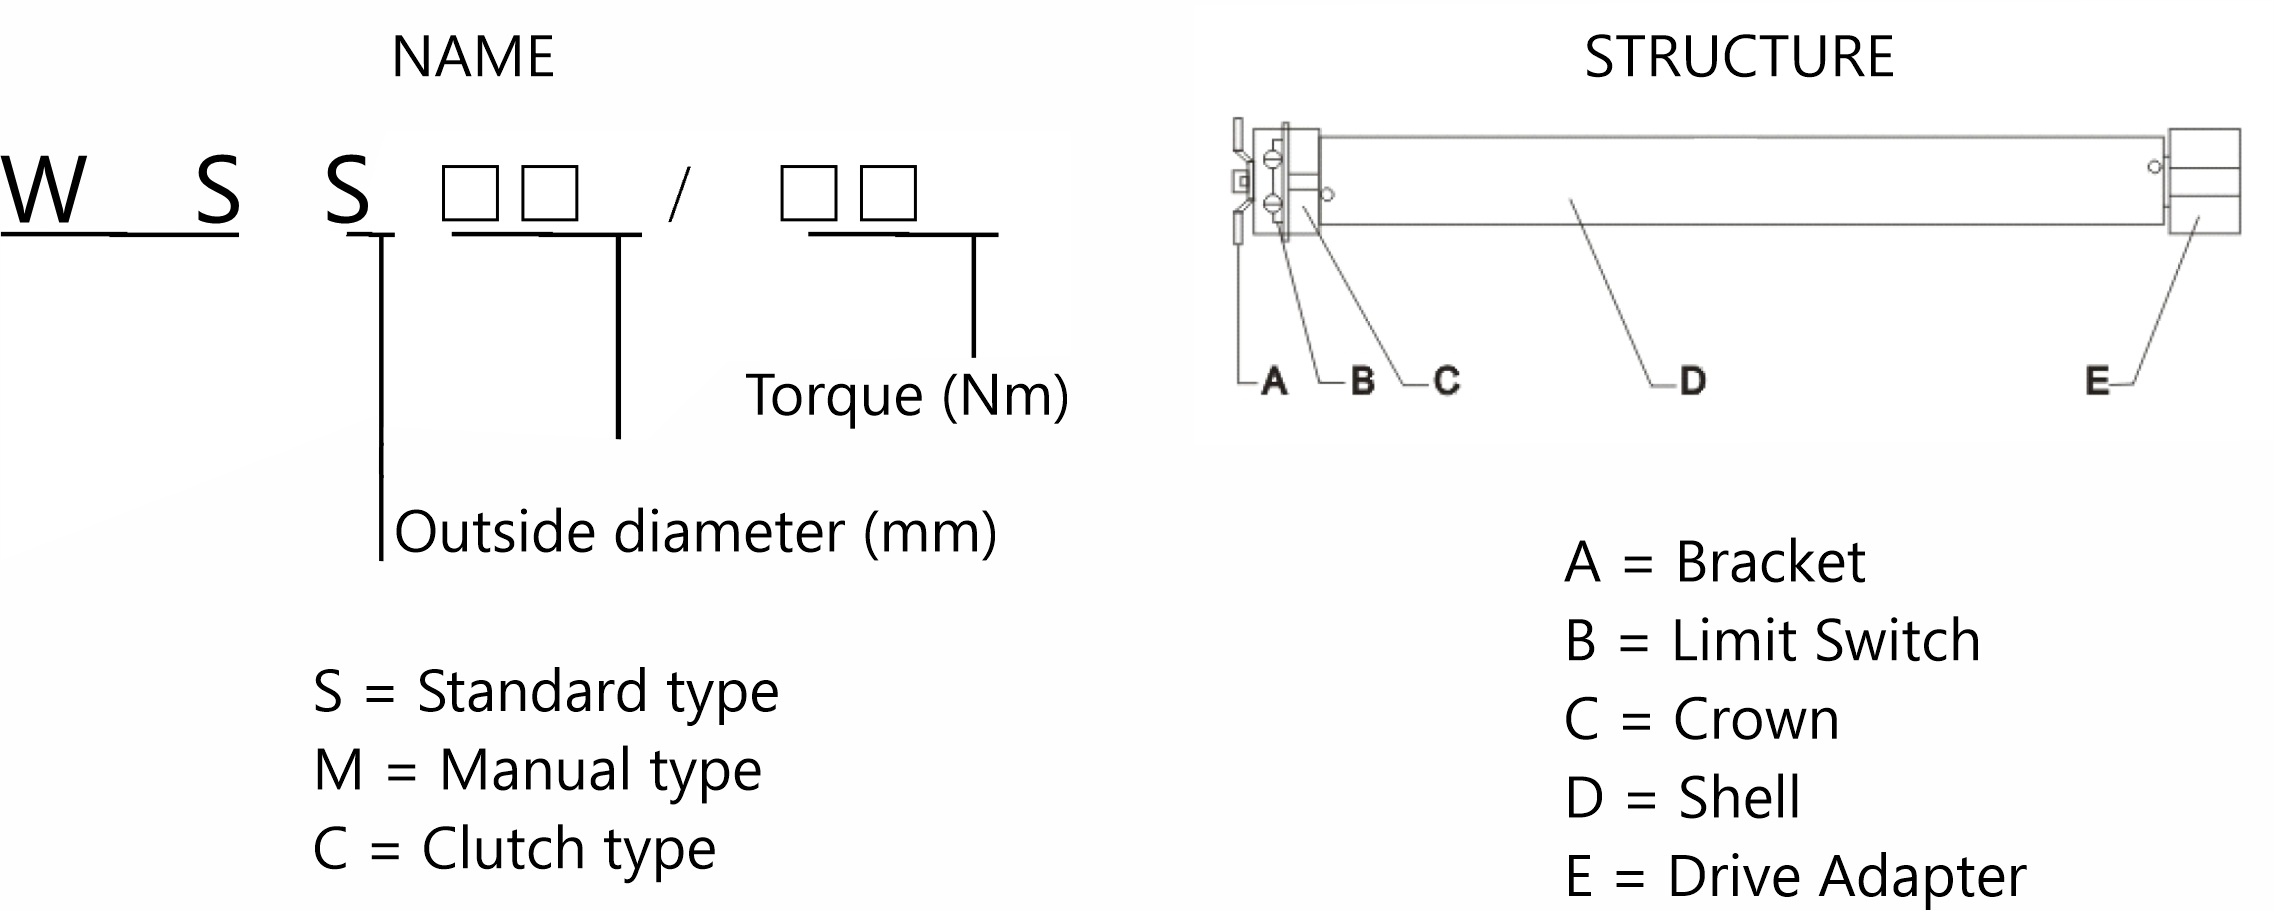
NAME AND STRUCTURE OF MODEL NUMBER

INSTALLATION
A. Motor and Aluminum Tube Instruction
- Set the crown and drive adapter into the fixed place on the motor and ensure the slot in the crown and the drive key on the limit ring fix compactly. The driver adapter is fixed by the clip spring.
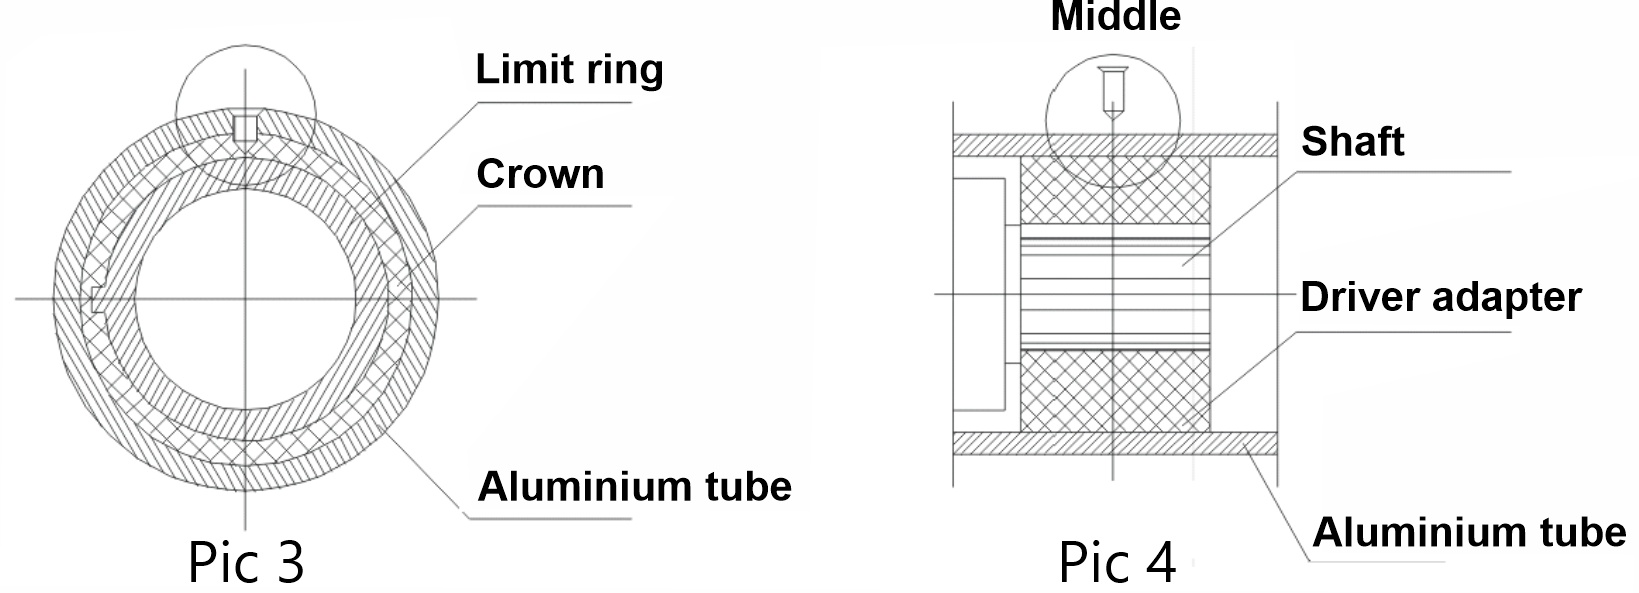
- Insert tubular motor into aluminum tube. The crown should match with the aluminum tube completely. If using round aluminum tube, the crown and aluminum tube mush be fixed by screws or rivets. Note: The screws which fix the crown must not reach the limit ring (see Pic 3); the rivets which fix the driver must be installed as Pic 4 and should be equally spaced around the aluminum tube on one circle; if the octagonal aluminum tube is used, it depends whether need rivets or not.
- Inset the end cap into the end of aluminum tube and fix.

B. Installation
- Before installation, the horizontal and vertical measuring must be made.
- Firstly fix the bracket into the end board, and then fix the end board and the orbit into the wall.
- Install the aluminum tube into the bracket. Make sure the aluminum tube is horizontal and is vertical with the door and window.
- Use the unlock dowel to fix the aluminum tube with bracket.

C. Installation of window shutter and transmission shaft
- Connect the wire according to Pic 8. Switch the power. After the motor stops running at one direction (the close state), cut off the power.
- Put the shutter into the orbit from above the aluminum tube. After that the window should be in the close state.
- Fixing the shutter and aluminum tube: first fix the place where install the screws, which should be equally spaced in aluminum tube line. Make sure the shutter doesn’t curl after being fixed. Ensure the screw not reach the face of the tubular motor.
- Make sure the connection between shutter and aluminum tube is Ok and the force bearing is balanced.
- The installation of tubular motor, aluminum tube and shutter see Pic 6.
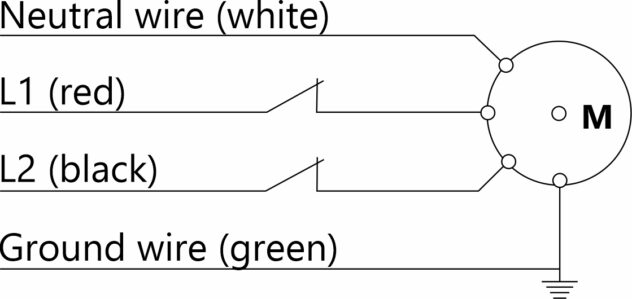
D. Wiring (for standard and manual override motors 120V/60Hz)
Pic 7

Notice: For safety, you must connect the wires (L and N) correctly.
E. Limit Switch Adjustment
- Switch the power, and the shutter will rise. Adjust the limit switch according to the mark on the limited switch. ( ) means the motor’s clockwise and anti-clock wise running; Use the adjusting pole to adjust at ‘+‘ direction and the journey of the shutter will increase; Use the adjusting pole to adjust at ‘–‘ direction the journey of the shutter will reduce. Repeat readjustment till settings are satisfactory.
- Adjust the limit switch according to the mark in the operation. The motor may be damaged if wrongly adjusted.
MANUAL TYPE
For manual type motor, when the power is unavailable, the motor can work through operating the hand crank. Connect one end of the link with the handle worm and the end with the hand crank, then the door can go up and down by operating the hand crank.
M type motor also can realize out door operation under the help of wall-cross lock. Connect the universal-join linking stick with the handle worm, then insert one end of the linking stick and wall cross stick in to the speed-reduce institution (fixed on the wall) respectively. At last the wall cross stick can be derived through turning around the hand crank to do the work of the motor.
SAFETY NOTE
- Repair and maintenance for the motor should be implemented by the authorized person.
- After opening the package, check the motor to make sure it’s not deformed or damaged and the accessories are completely attached.
- The electrical outlet must include the grounding wire connection terminal and it should be connected with the ground fully.
- The motor should be tested without load, to insure that it does not make abnormal noise.
TROUBLESHOOTING


